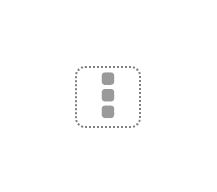
When certain types of elements are clicked in a Bubble.io application, they’ll sometimes leave behind an annoying frame that can be pretty disturbing to the beautiful design you’ve set up.

There’s no setting in Bubble itself to get rid of this, so the tweak requires some custom CSS code.
What’s the purpose of the element frame?
Before we proceed to remove it, let’s quickly discuss why it’s there in the first place, as it does actually server a purpose. You may have heard of the The World Wide Web Consortium (W3C) They’re actually a membership consortium of more than 455 different organisations that work together to develop and maintain international standards for the World-Wide Web. It’s led by none other than Tim Berners-Lee, the father of the internet, so it’s fair to say they have major gravitas in the development of the standards used by web browsers and designers worldwide.
One of their interests is to make sure that the web is open and useful for everyone, including those who struggle with impaired vision or am using a web browser without a mouse (using the tab button to navigate instead). The purpose of the CSS outline property, which is the one creating that frame, is to help users understand which element is currently in focus. In other words, if you remove it, you’re actually making your page less accessible, according to the standards set by the W3C. Not only can that affect your Users, it can also actually affect your SEO score, as the major search engines prefer pages that are compliant with modern web standards.
That leaves you with a few options:
- You can keep it there, to make sure your page is accessibility friendly
- You can remove it from some pages, but not others (such as removing it on logged in pages but keeping it on your front-end facing pages to make sure it doesn’t affect your SEO)
- You can remove it everywhere
Ok! With that out of the way, let’s look at how you can remove from all pages, or just a single one.
Removing the element frame from all Bubble.io pages
First, let’s look at how you can remove it from all your pages with just a simple change in your app’s settings. Note that this solution only works on paid plans.
First, open up the SEO / Meta tags section of your application’s settings, as illustrated below:

Then, scroll down to the multiline input field that says Scripts / Meta tags in header and paste the following code:
<style>

* {outline: none !important;}

</style>
What exactly are we doing here? The outline is the CSS property that tells your browsers that you want the frame around the focused element. It’s enabled by default, and by setting it to none, you’re disabling it. The !important rule tells your browser that you don’t want this declaration to be overridden anywhere else: you want it to apply everywhere. The asterisk * means apply this to all elements.
The <style> tag simply means that everything inside of this tag is CSS, so make sure that you’re not placing any other CSS code outside of this one.
Removing the element frame from a single Bubble.io page
If you want to make that change to just one page, the solution is similar to the above, but we’ll apply it elsewhere to avoid it being added to all pages.
This time, navigate to the page where you want to apply the CSS code. Then, on that page, add an HTML element. It’s best to have the element at the top of the page, as your browser loads the page starting in the upper left corner and working its way down.
Then, paste the same code from earlier:
<style>

* {outline: none !important;}

</style>
And that’s it! To test that it’s working, place an icon on the and attach a workflow to it to make it clickable (you don’t actually need any actions in the workflow). Then run your app, click the icon, and open another tab in your browser. When you return, there would usually be a frame around the icon that’s now gone.
Let us know in the comments if you have any questions. You can check out our Bubble.io quick tips tag for more short Bubble articles or check out our professional Bubble.io books for more in-depth advice on how to build great applications! If you’re new to the platform, check out our in-depth Bubble.io review.


